


Some Painting Process Steps
And How to Easily Laminate Heavy (rather than thin) Archival Paper to Masonite Panel

Every time I set out to document a painting with many photographs I invariably get involved in the process of painting the work and forget to take a lot of pictures. But I usually do manage to get at least a couple of shots, which I hope will be informative in showing my process…at least in this kind of picture.
I’ll also show you how to easily laminate a work on archival paper (I’m using Stonehenge here) to gessoed Masonite panel. The gluing process is a little different than gluing thin papers to panel (which I showed in last month’s email).
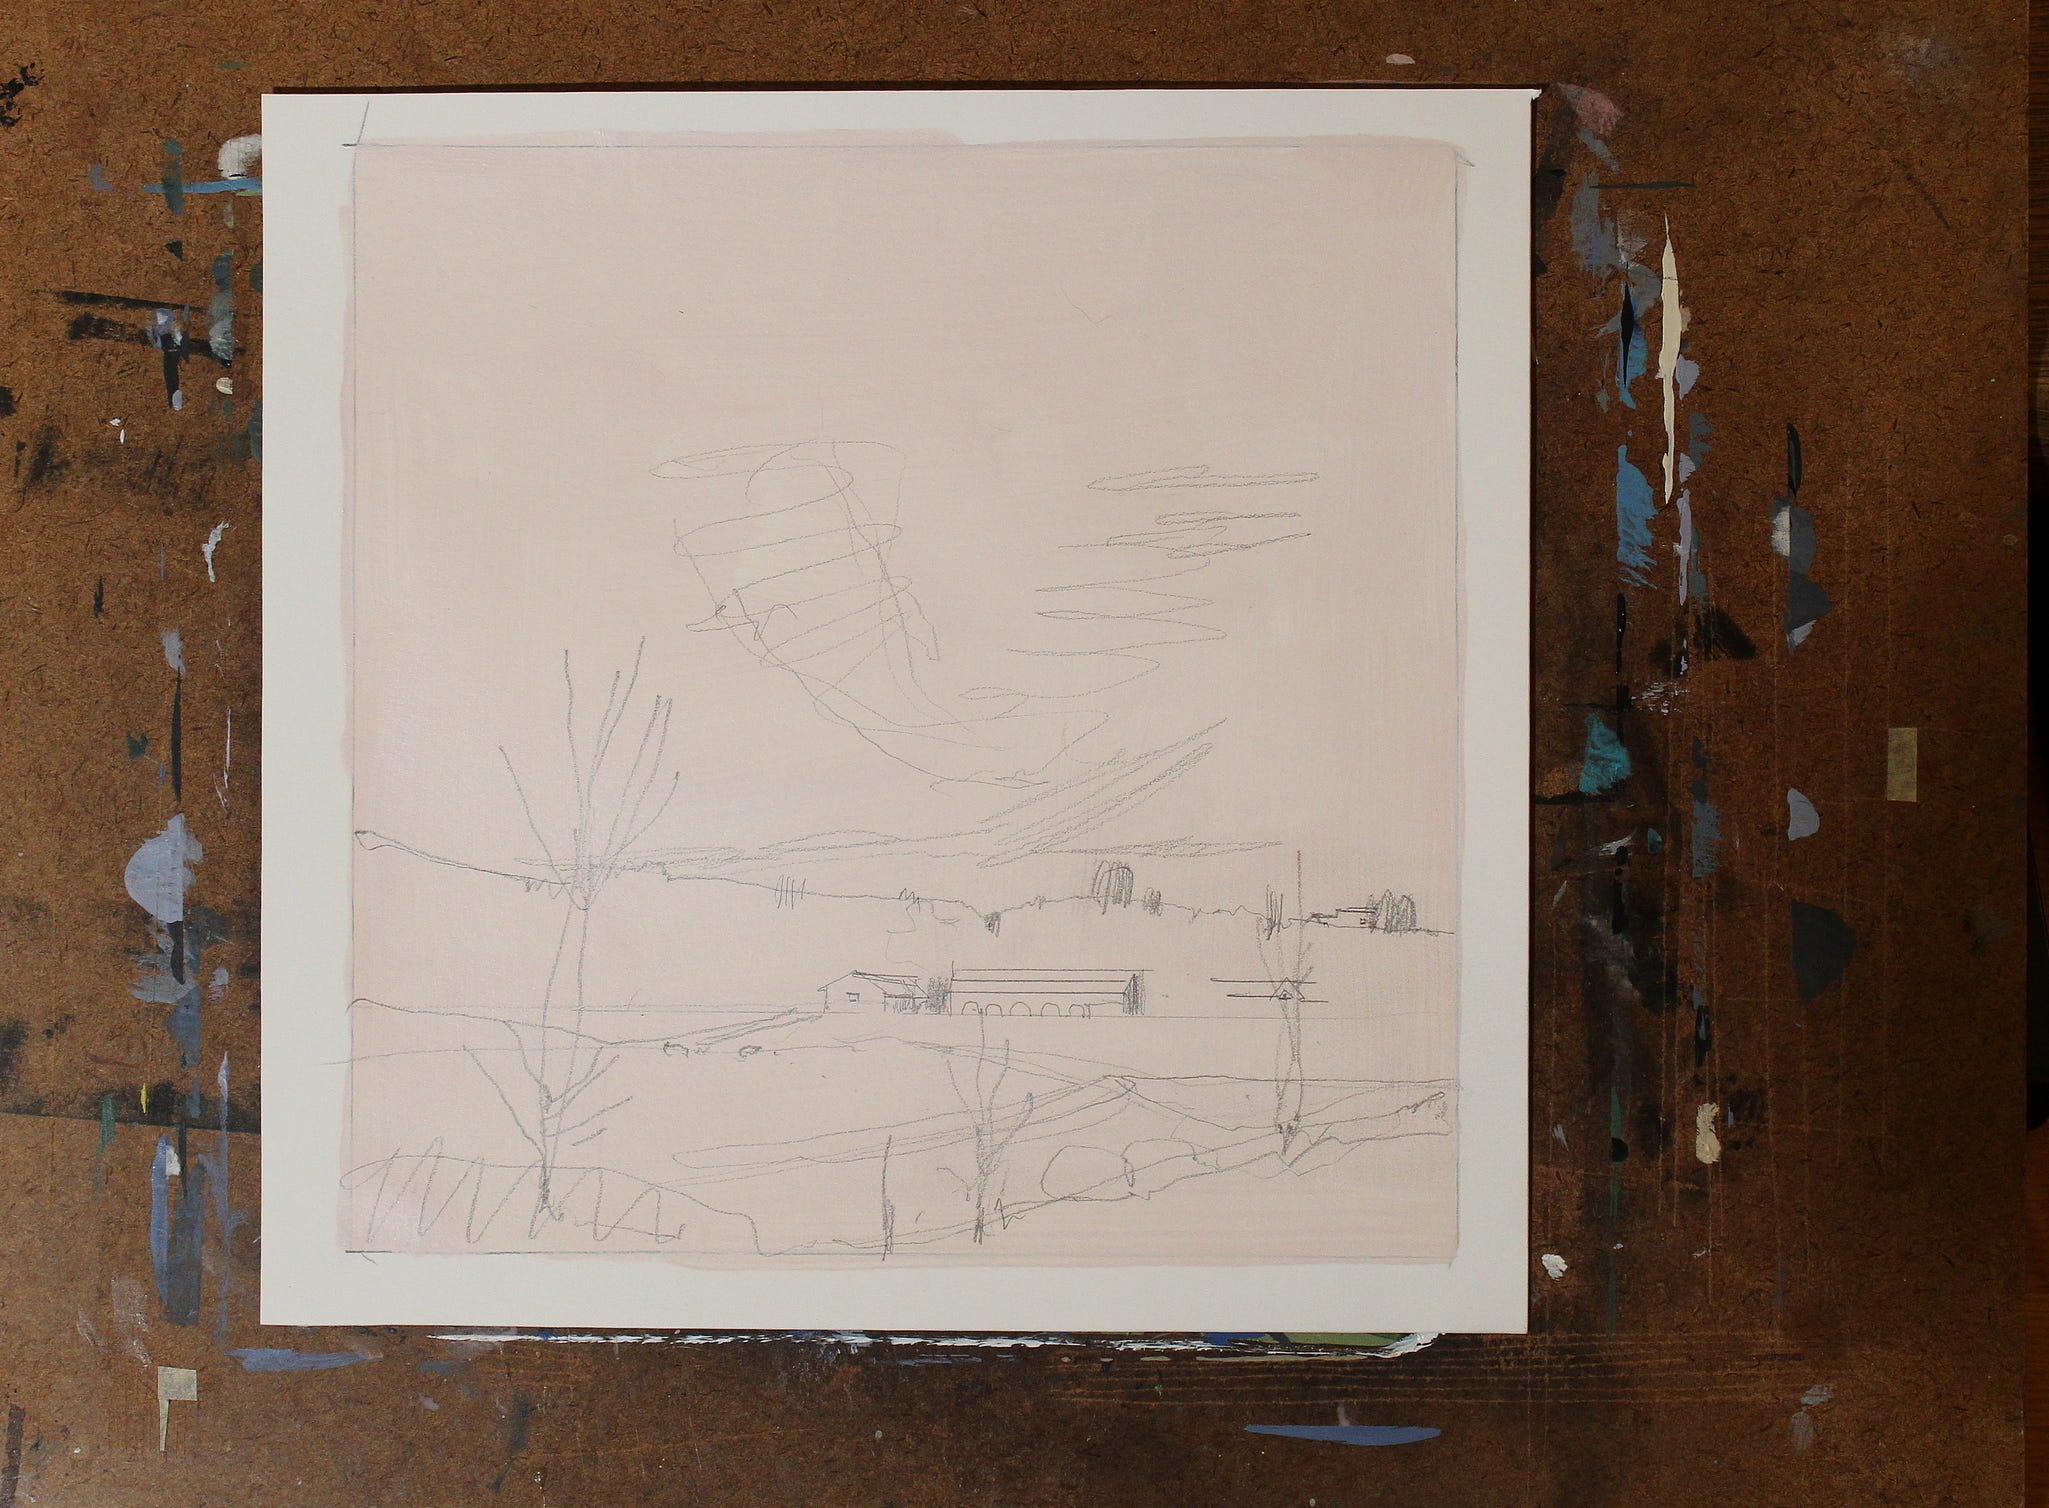
I traced the panel I’ll be using onto the paper so that I’ll have an exact match. I quickly primed the paper with a light pink acrylic paint mixed with Golden Acrylic Glazing Medium. This provides a nice slick surface, which I like.
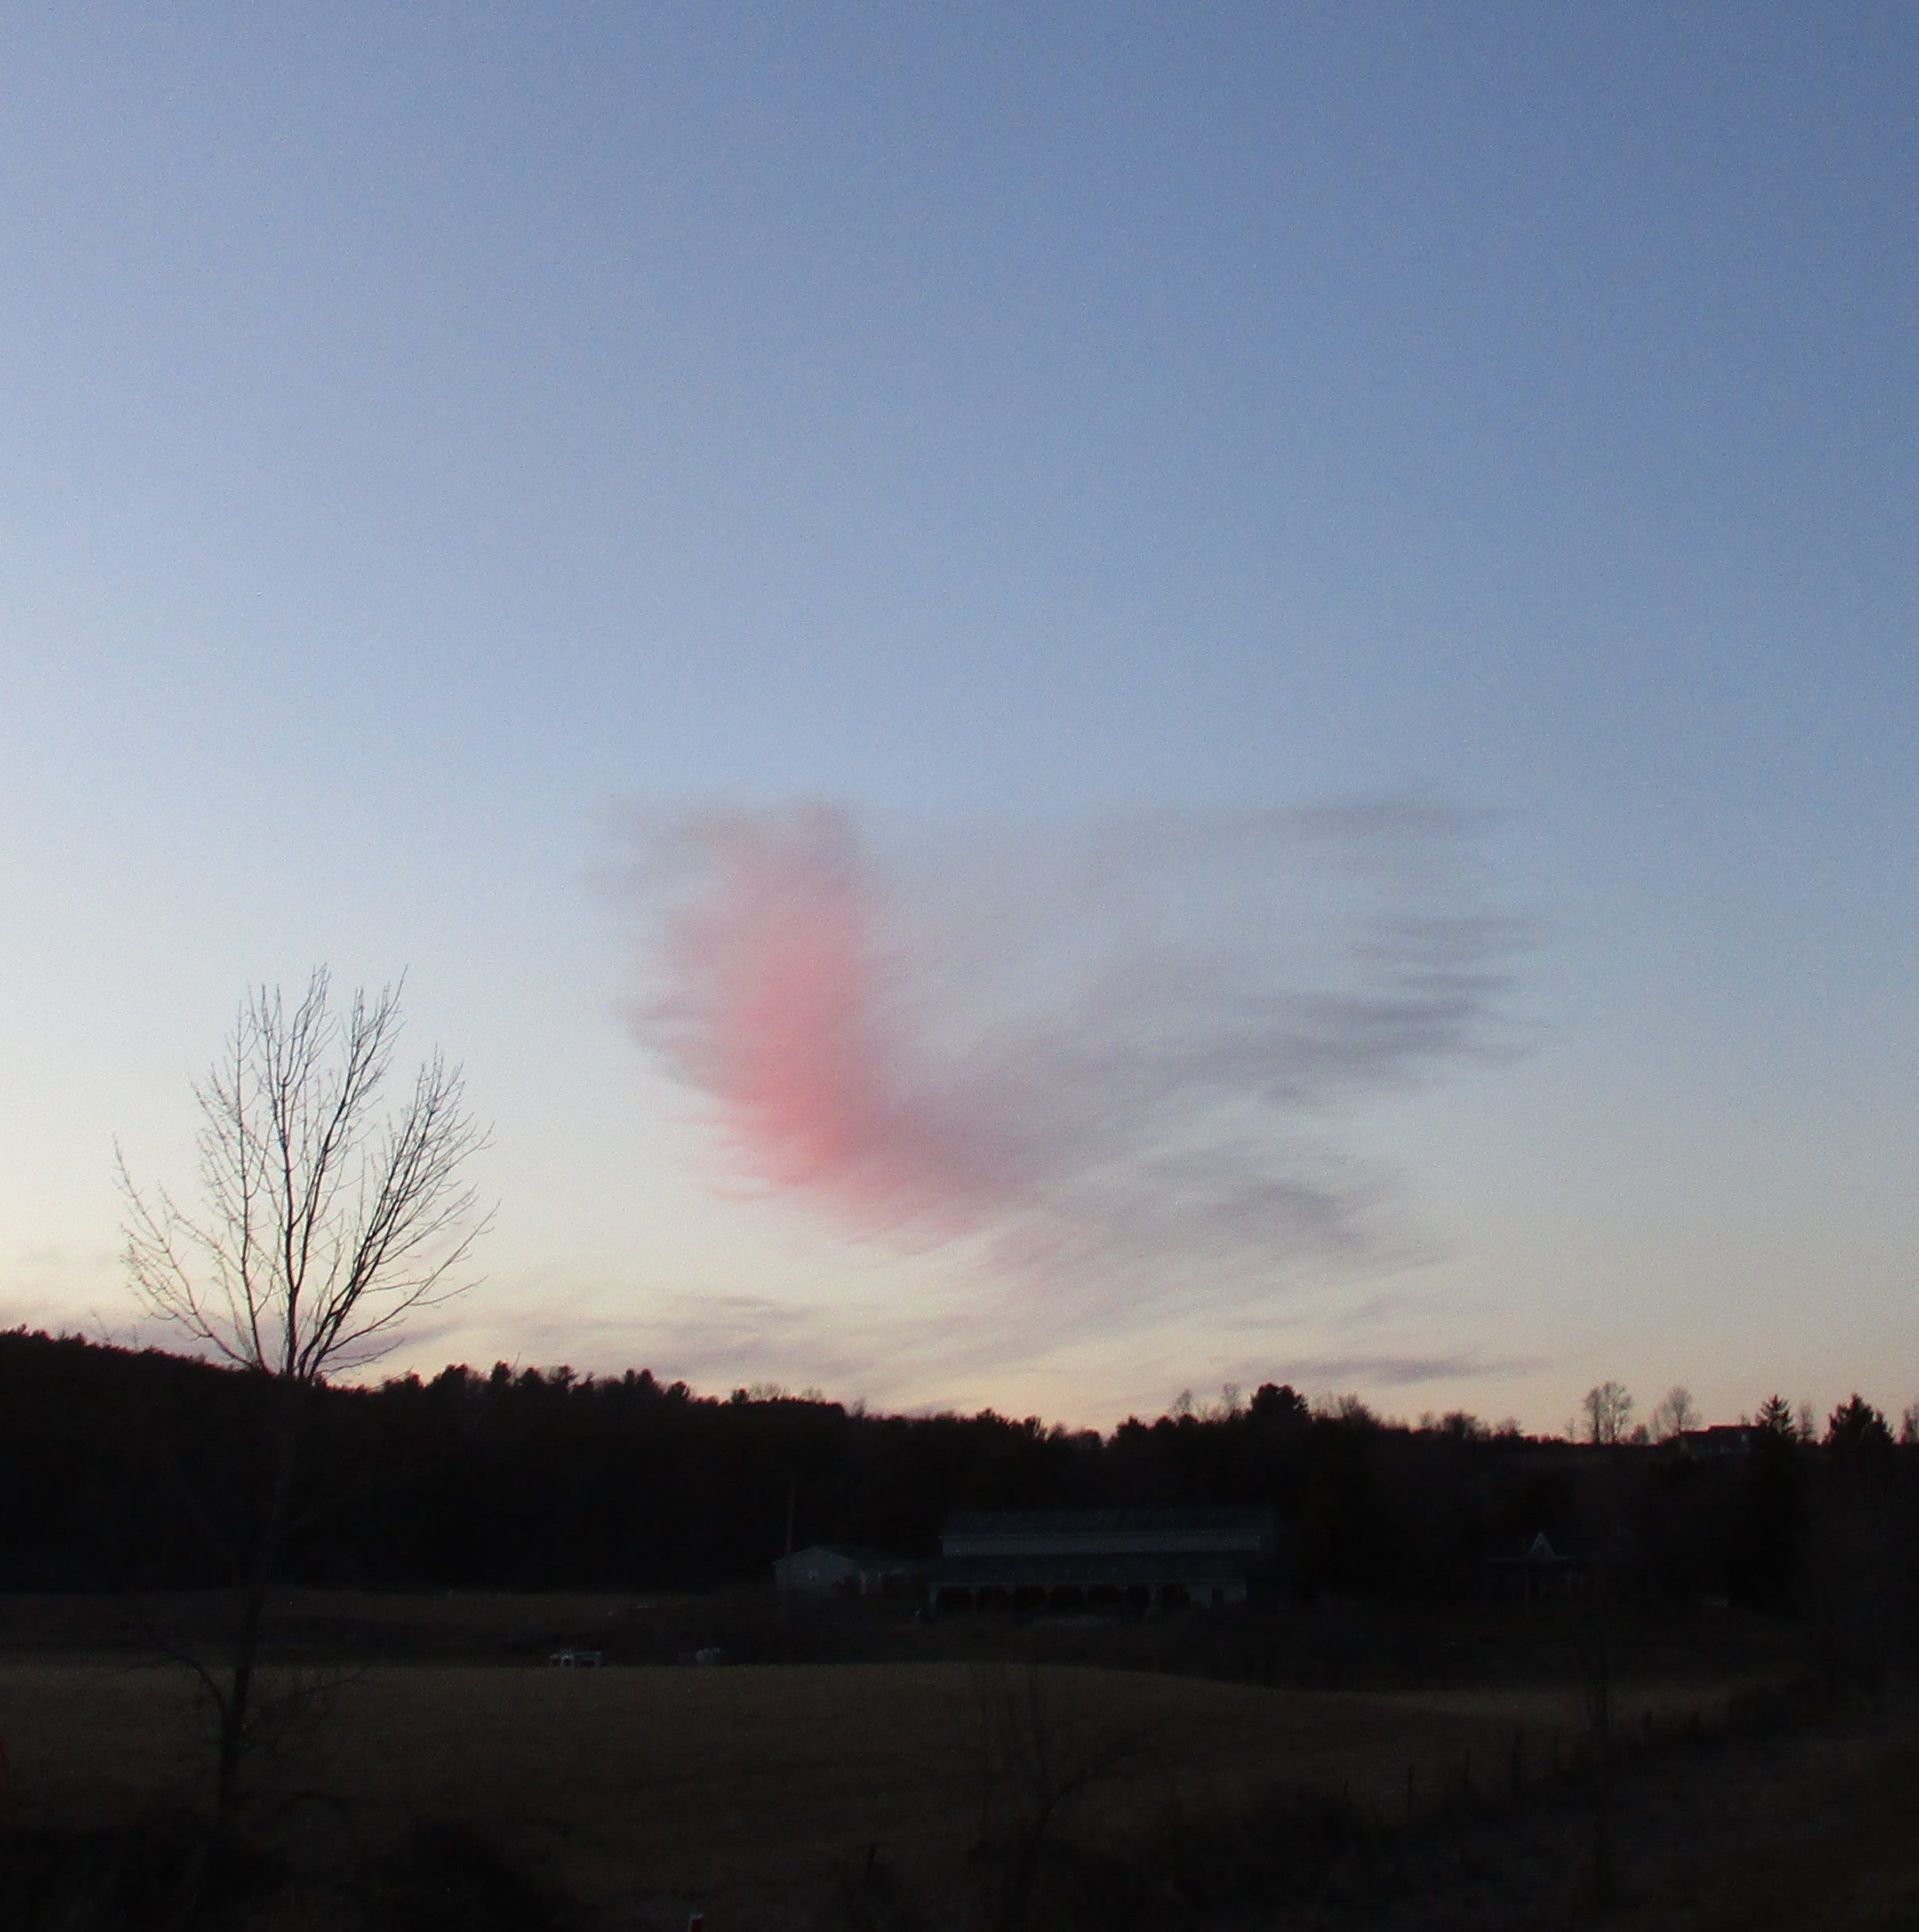
I’m working from a photograph here. I take such photos almost daily and I usually crop out sections to use.
The pencil drawing I make is quite automatic. It happens quickly, without stopping, and it’s a simple mapping of compositional shapes, including big, middle, and small sizes.
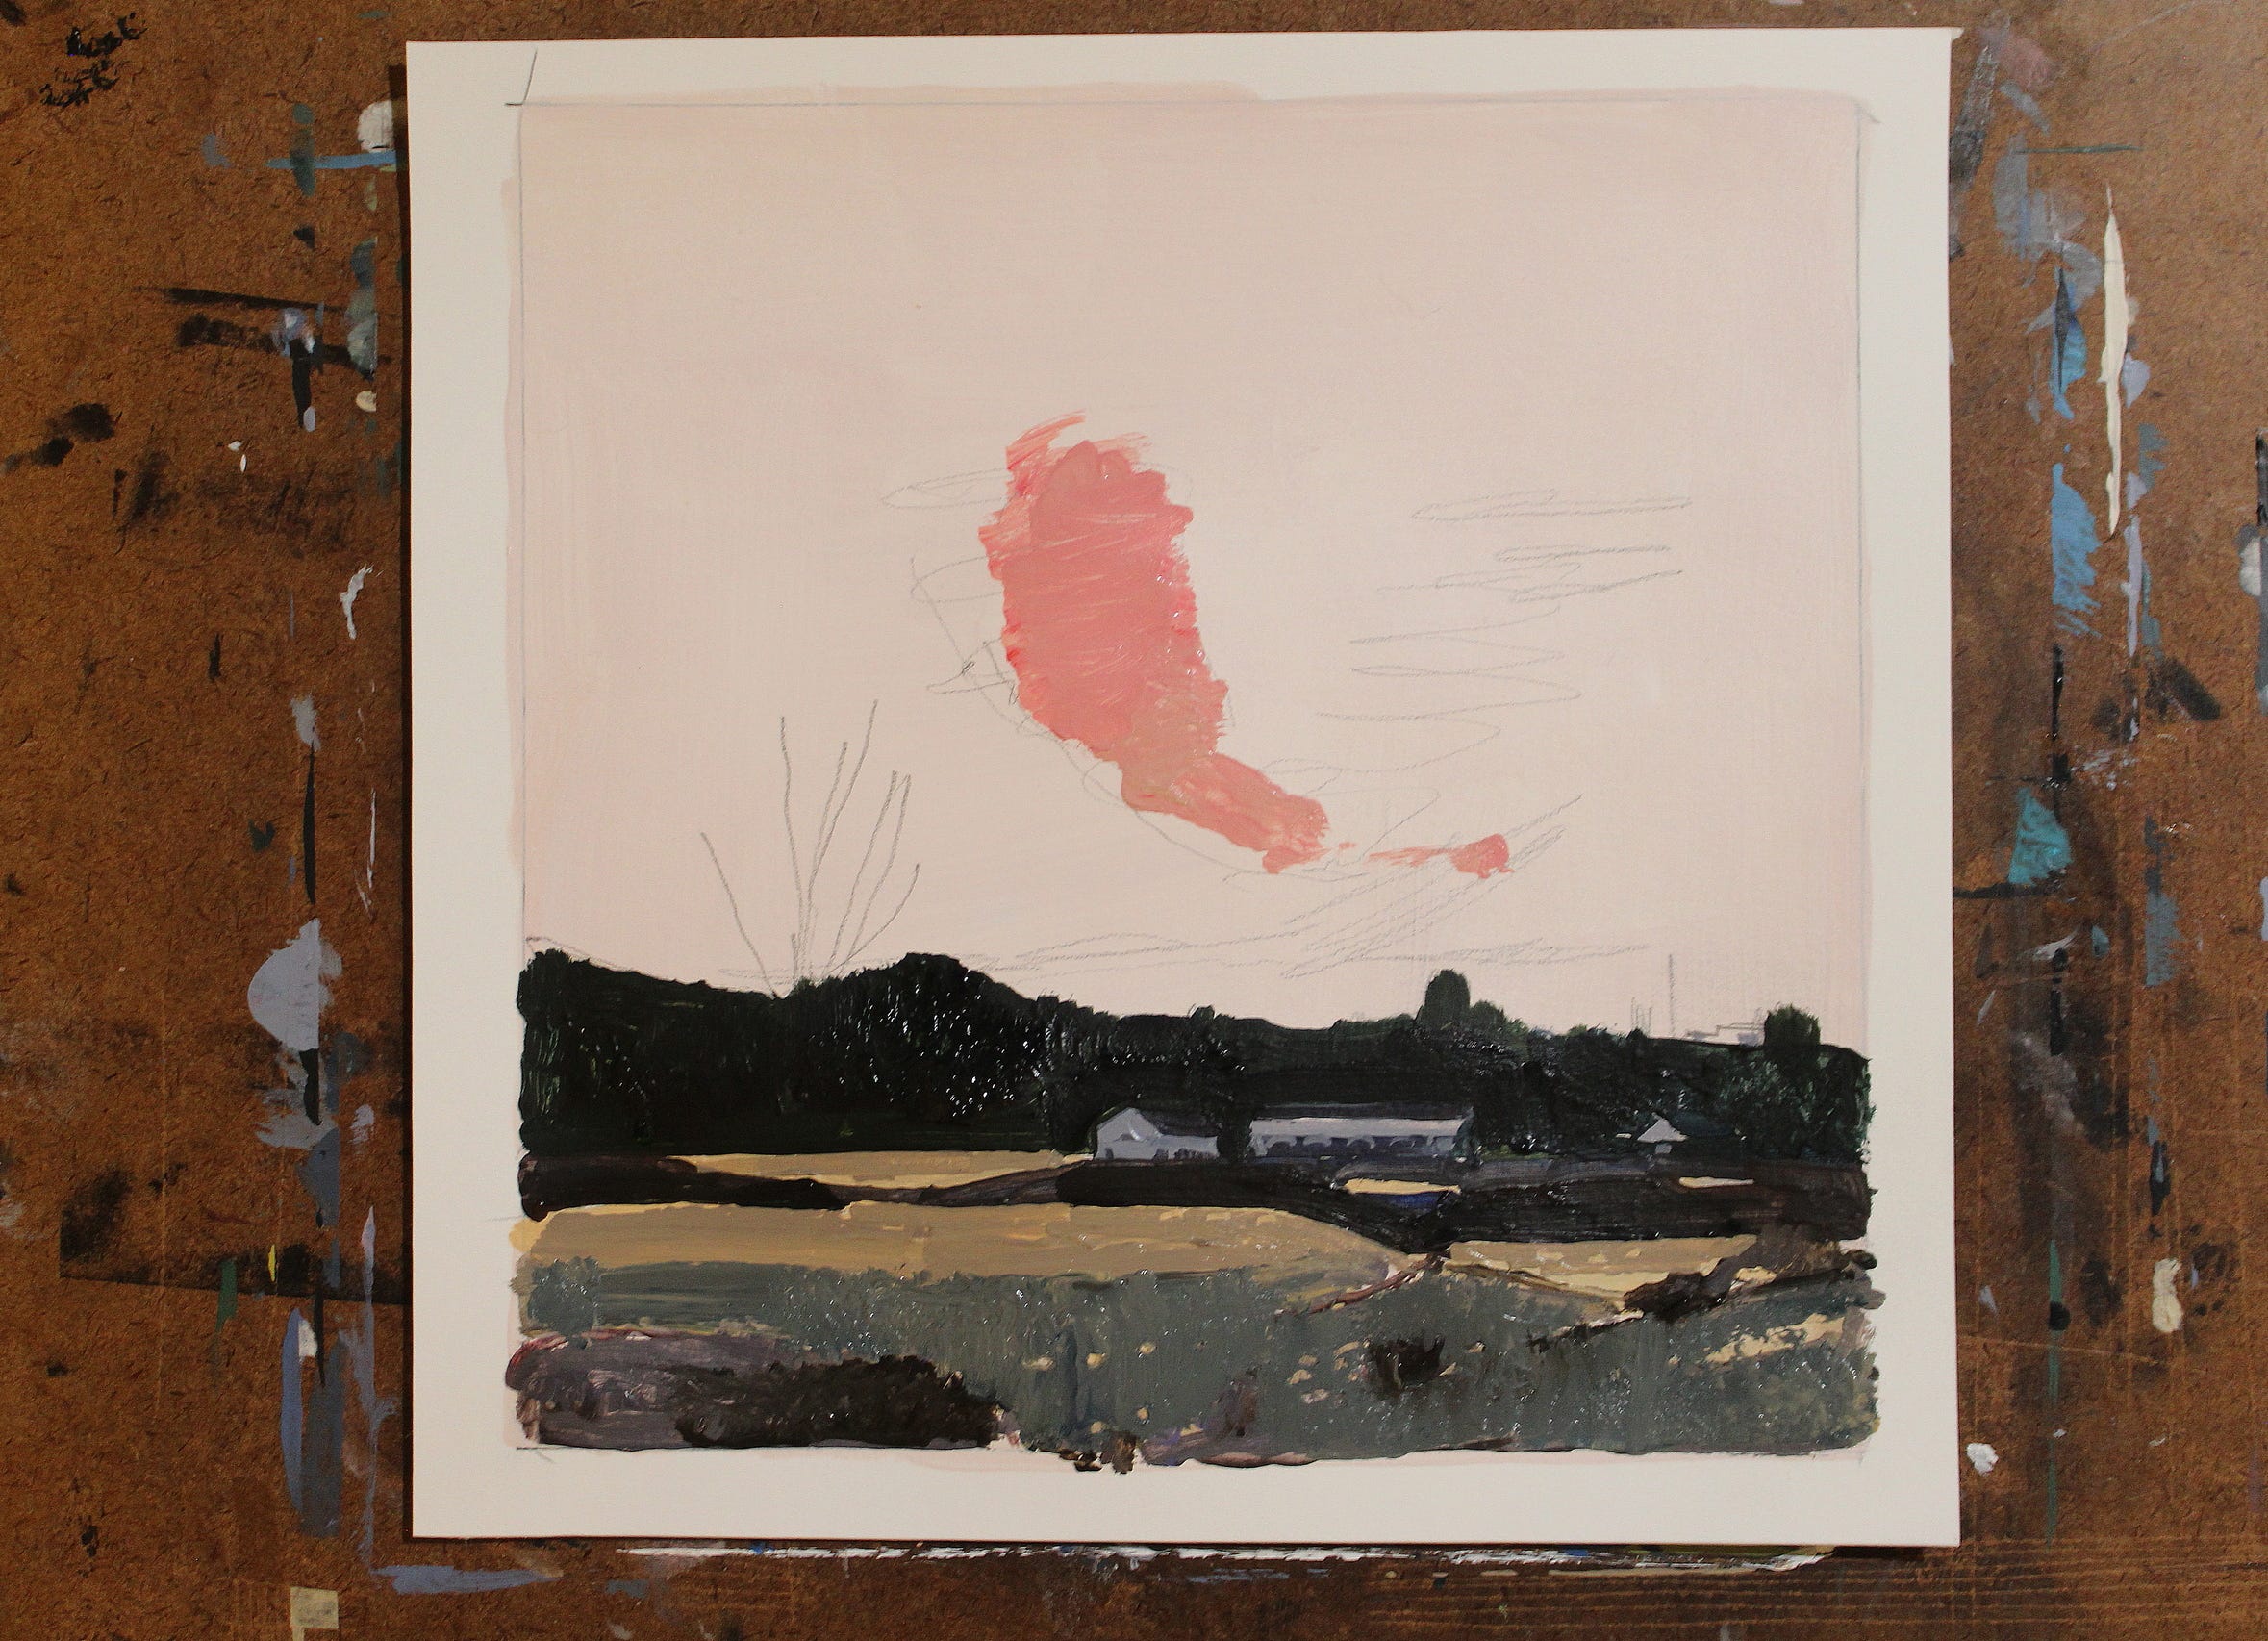
Whenever a choice is made about a subject to paint, there are certain essentials that have to be kept to establish mood and structure. That’s not a long list. So when I start painting I keep those essentials in mind. I did a bit on the buildings, but really kept them to a minimum. The forest darks needed to be there and I wanted to establish the sky pink fairly early.
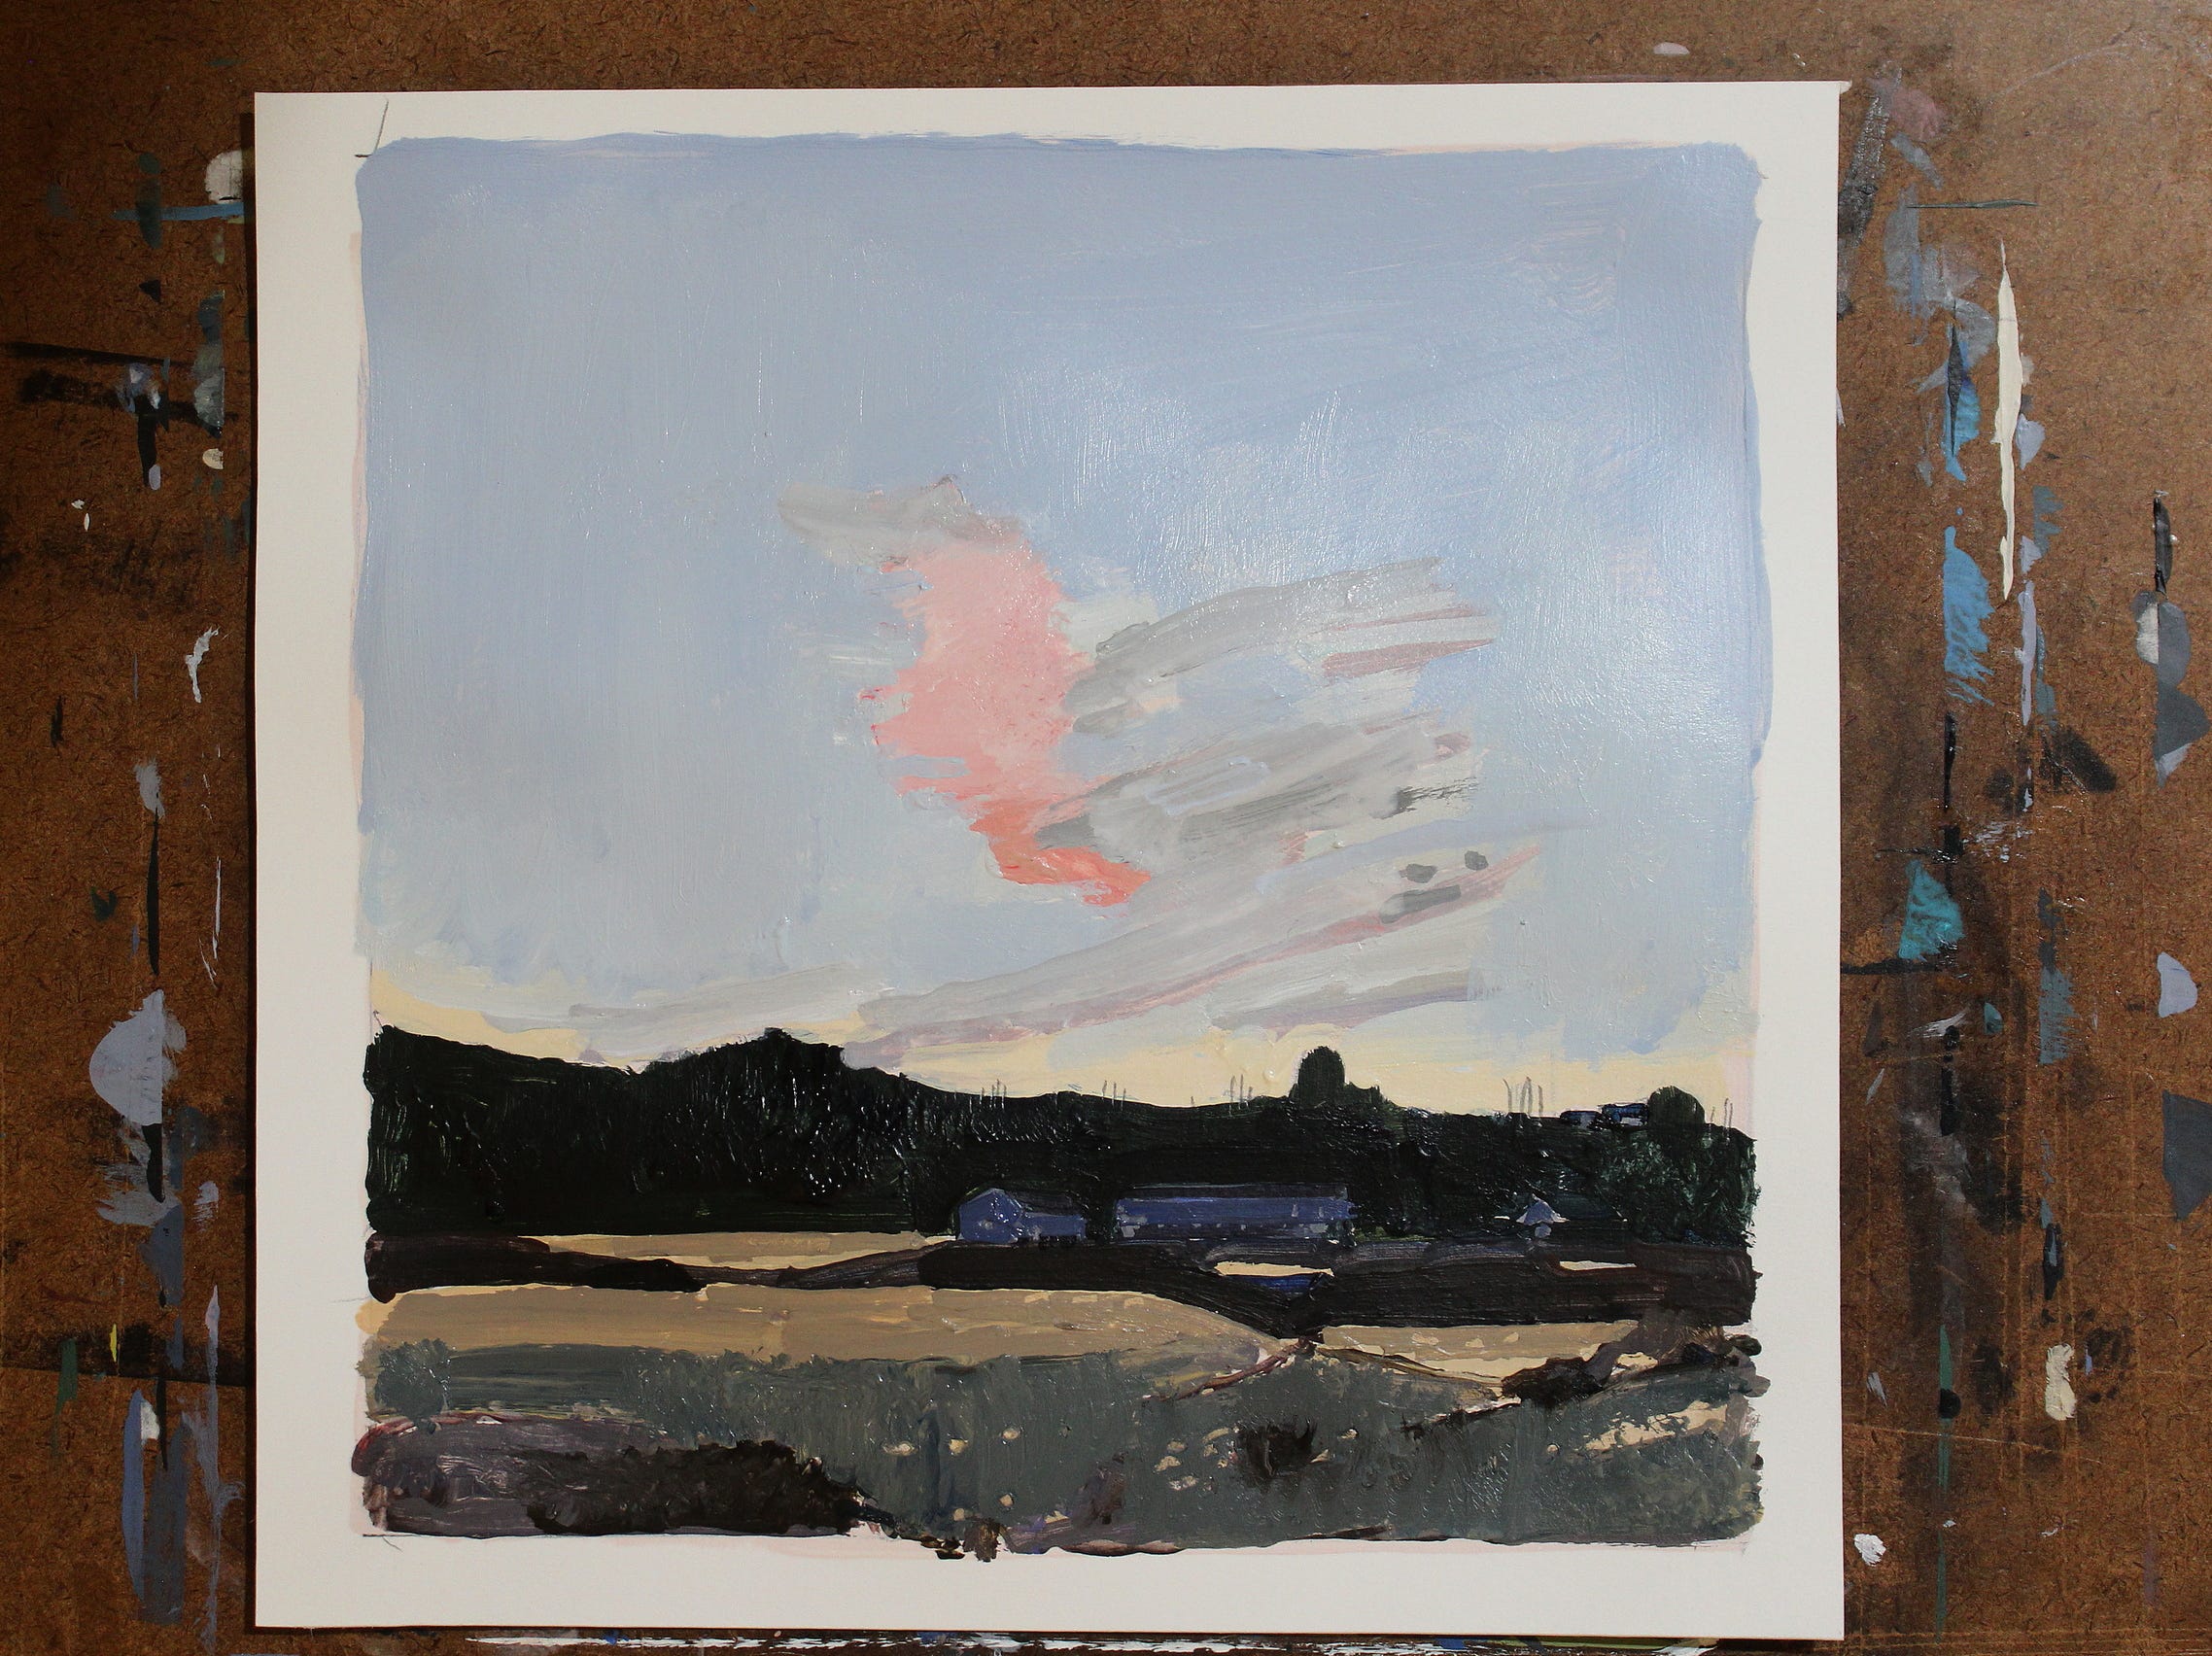
Color relationships are always key. In every one of my pictures you are likely to see a dramatic use of light and dark. You will see some bright color, and some greyed color. You’ll see reference to scale…there will always be some small bits among the large and middle areas. I try to let some line remain. I try not to kill the natural expression of the paint and brushwork. I try not to over-control.
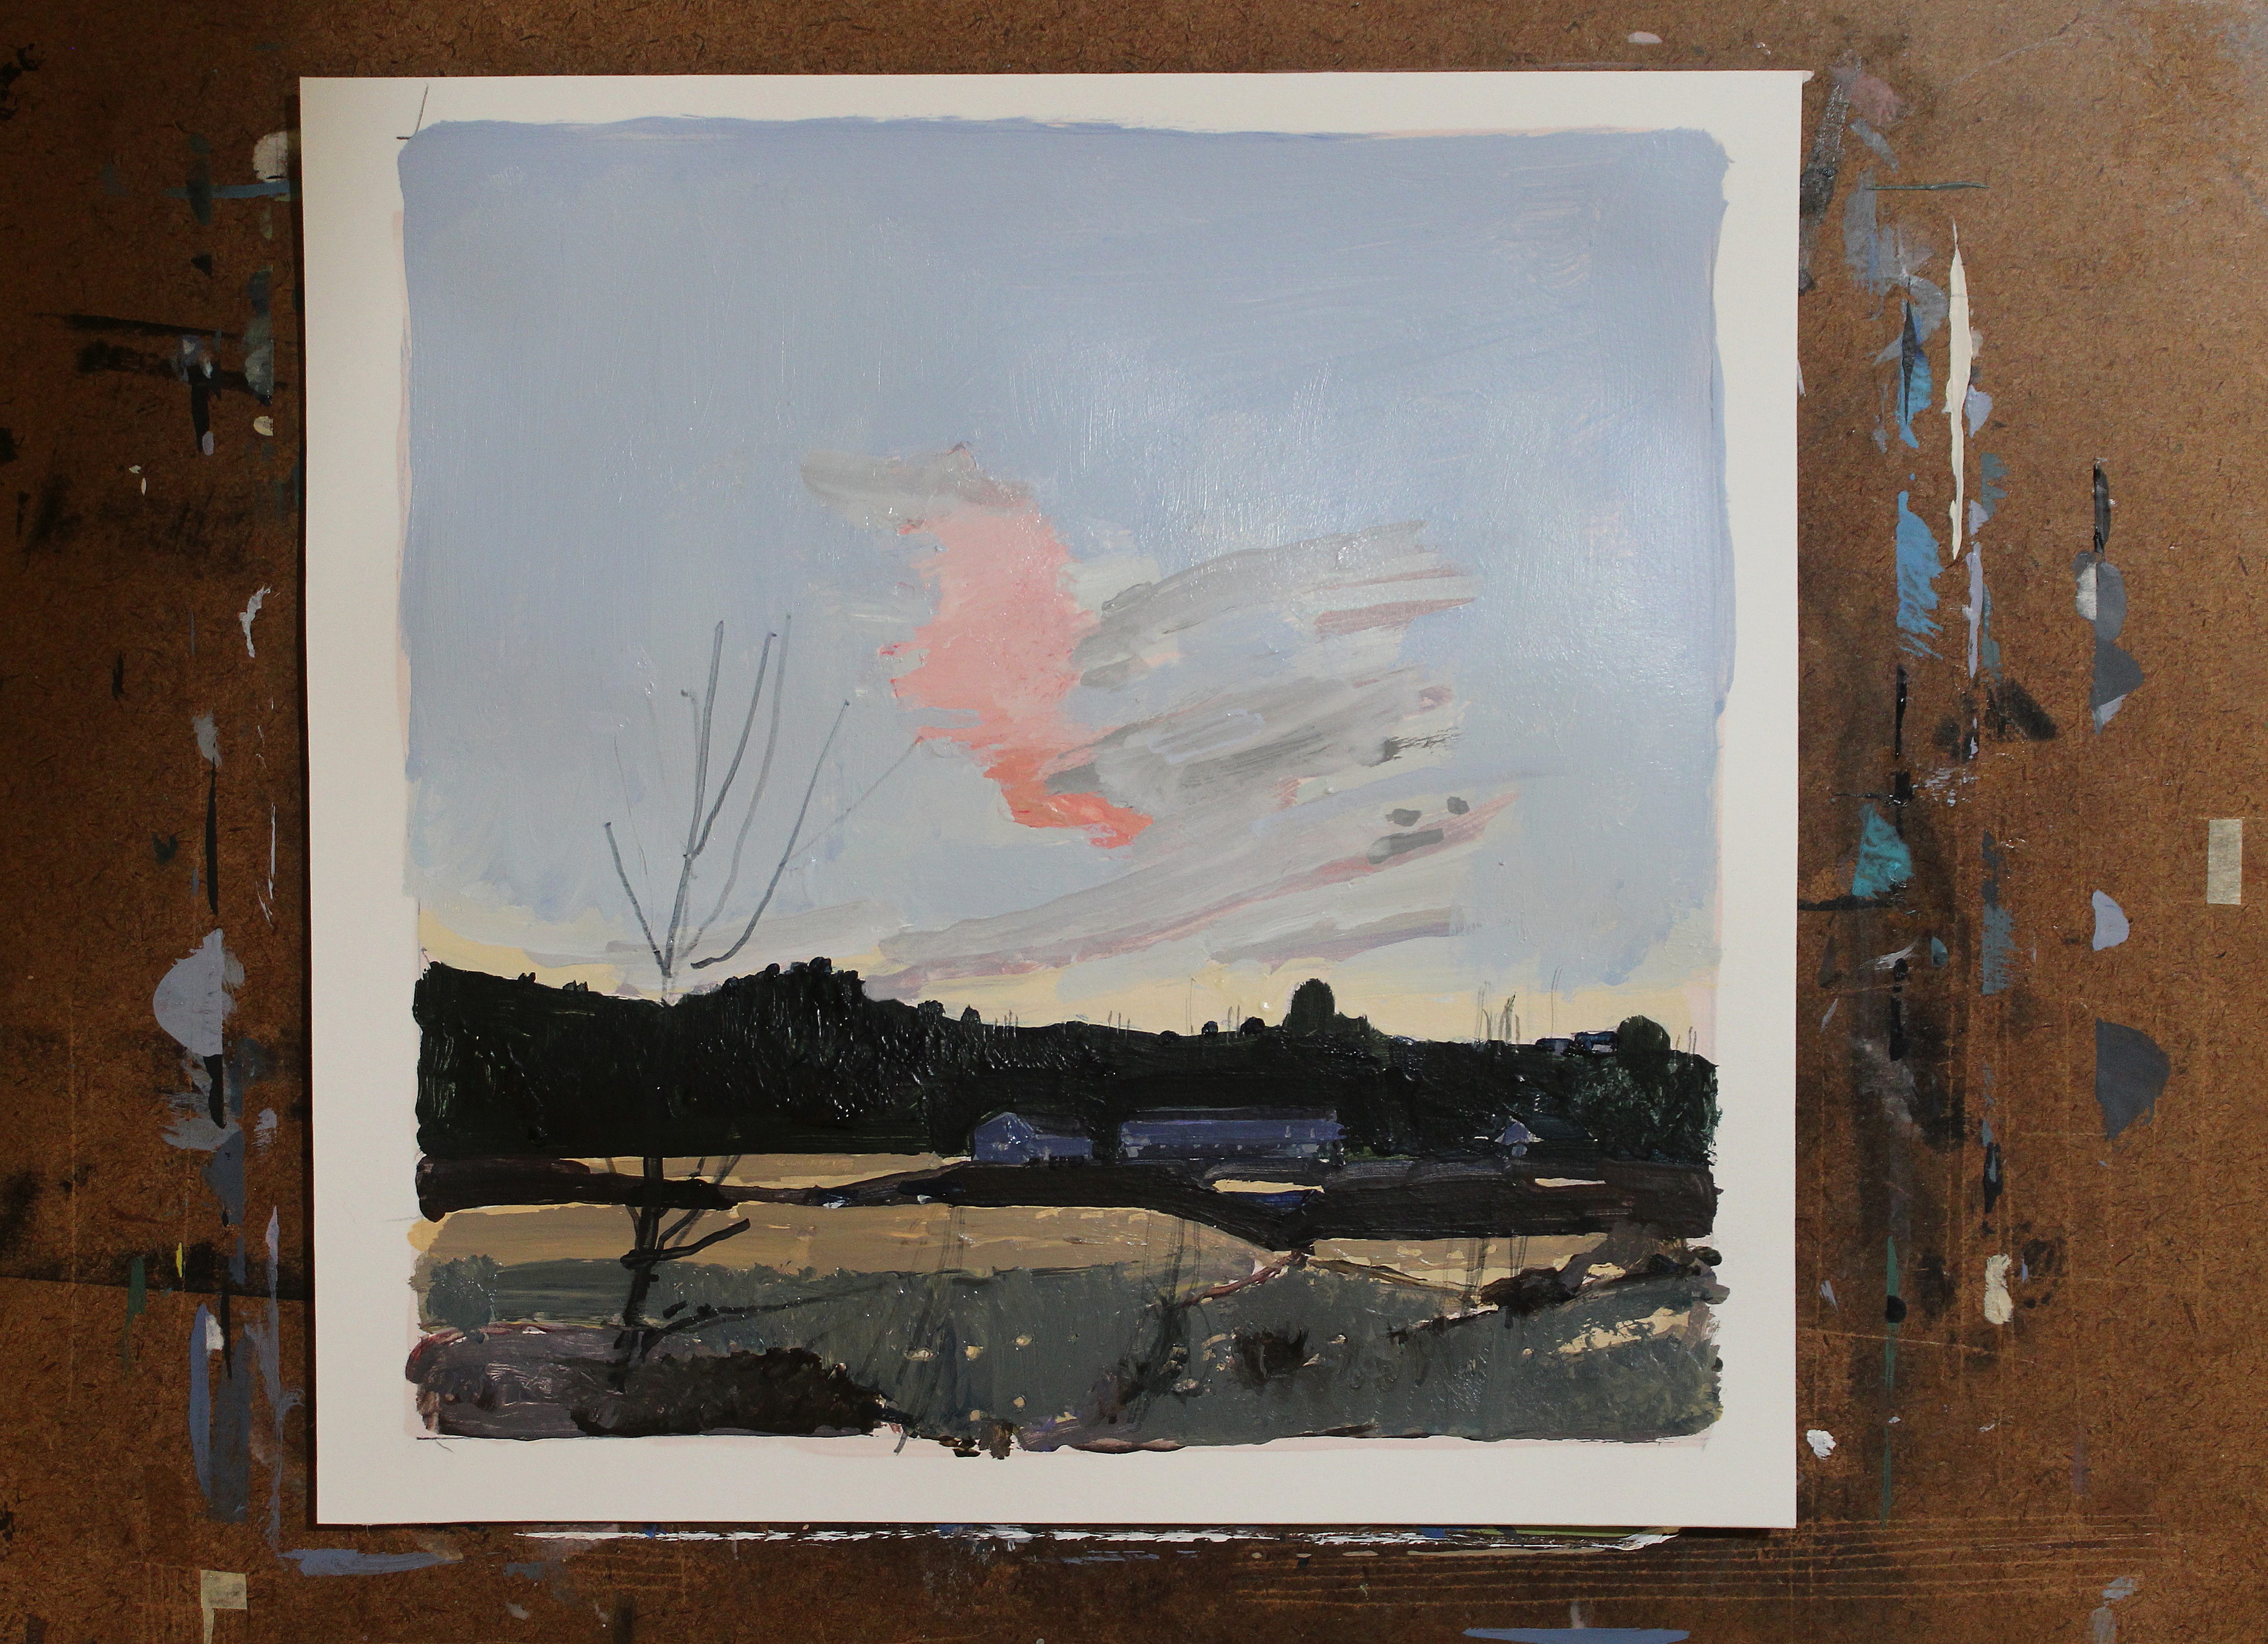
I have a very tiny soft bristle brush that I like to use at the end for tiny things, like a few details in the building, and the thin branches. This reference to scale is a pet fascination of mine….to see a small thing among large things refers to our sense of movement in the world through distance. It’s like seeing someone from afar and waiting for them to approach to you.
These works could be presented just as works on paper, but I’ve designed them to be laminated onto panel, so I paint just to the traced edge, and sometimes a touch over, so I don’t end up with a white rim when the gluing onto panel is done.
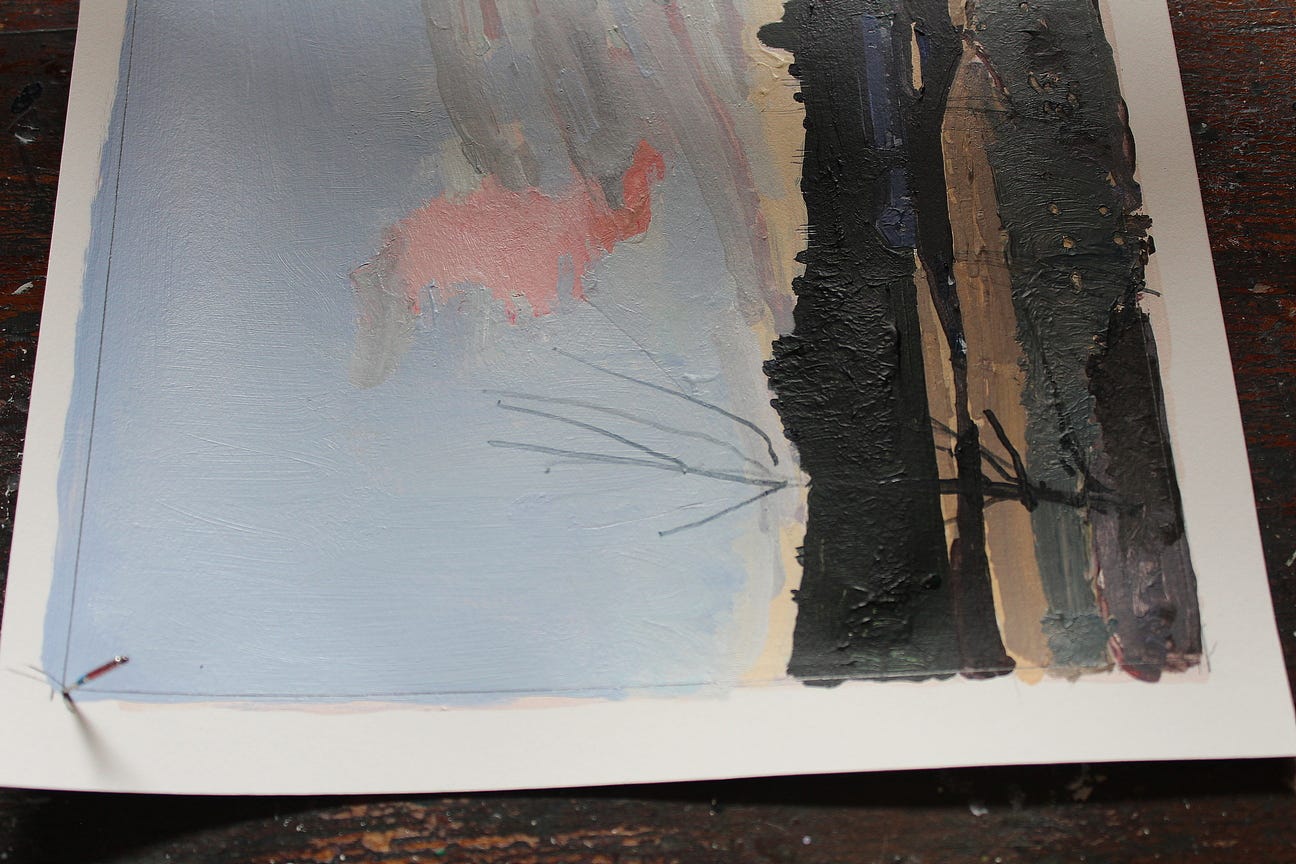
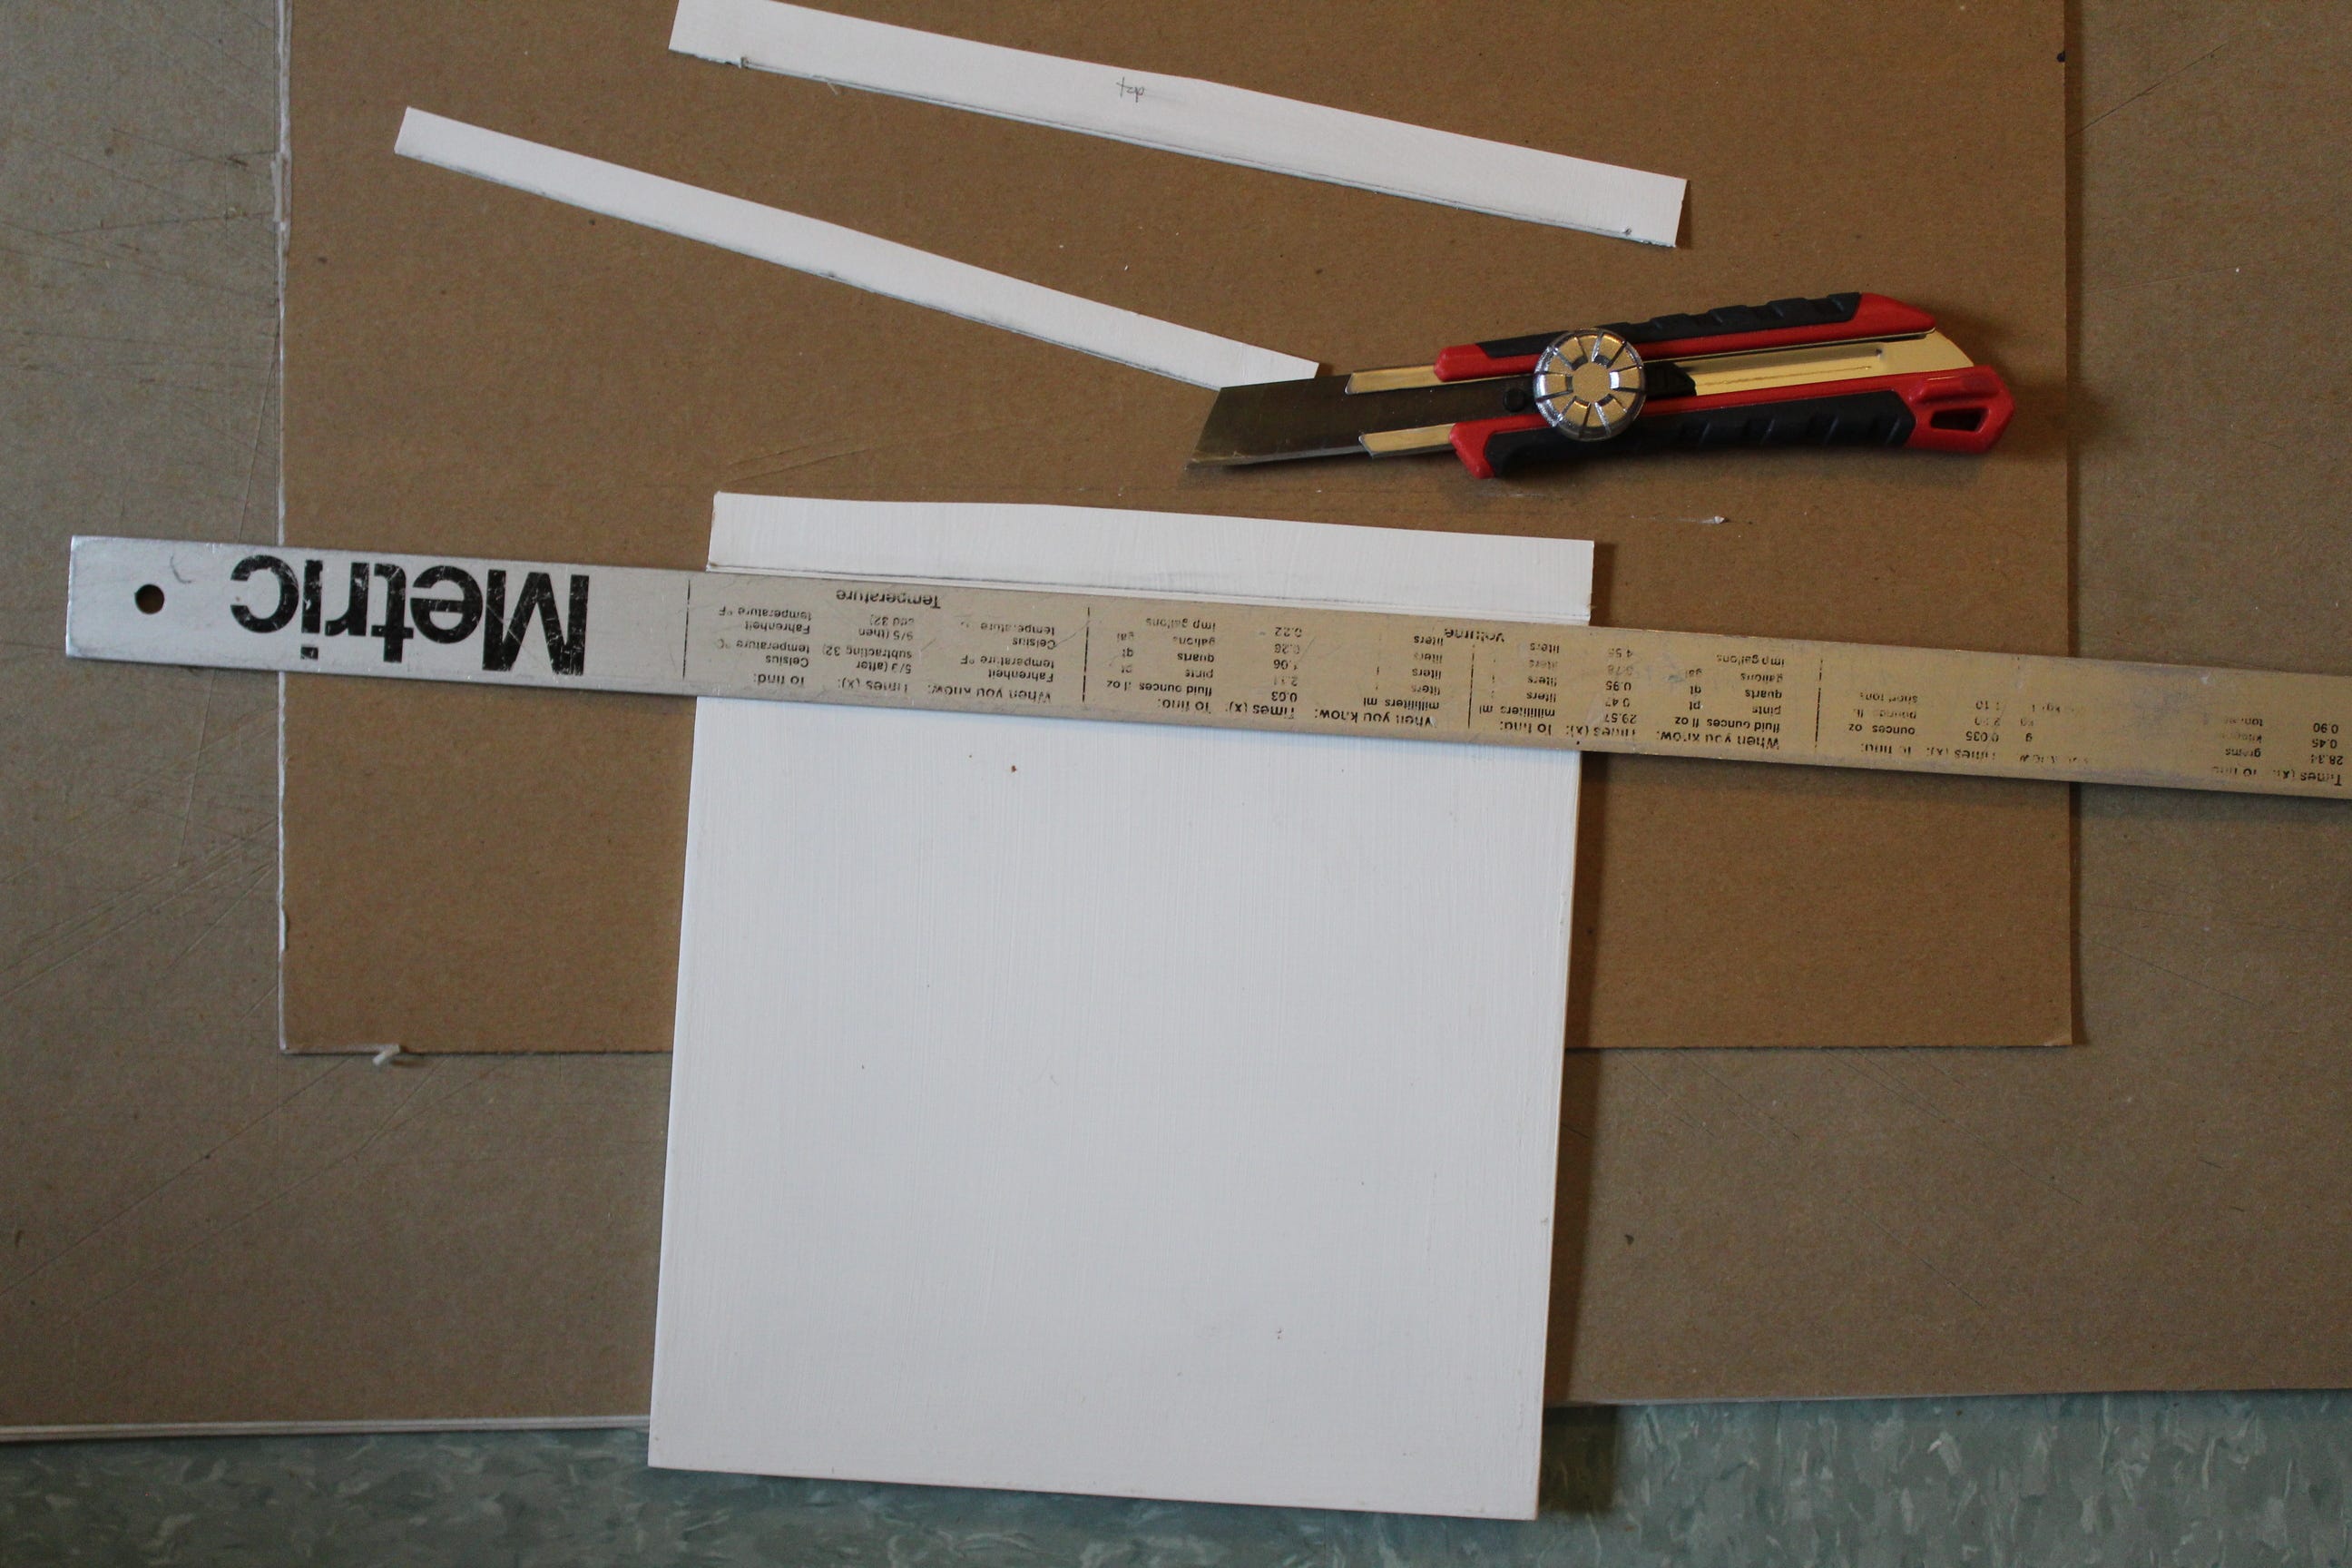
There are cool little tricks to everything! When the work is dry I re-trace the panel that has been set aside for this work with mechanical pencil (keep the line thin). At each corner I press through the paper with a needle, so that this hole is visible from the other side.

On the back of the image I use a ruler to redraw the square to correspond with the needle holes. This tells me exactly where the panel will need to be glued and will serve as my guide.
I don’t have any photos of the gluing down stage because time is of the essence during that part. But as was stated in my March write-up, I first spray water onto the back of this work, and using a clean soft brush, I brush that water into the paper, and blot the excess water off my brush onto a tissue. I then pour some Lineco PH neutral adhesive onto this area and brush it into the work, keeping an even layer. It’s important to have an even layer or the front of the painting may not look flat at the end of the process. Next, I spray some water onto the gessoed panel and brush it into the panel and remove any excess….I want a rather damp, but not overly wet panel. This just helps the 2 surfaces to attract each other. I apply the panel within the square, turn it over, and use my plastic scraper and protective paper over the work, to apply pressure and remove any air bubbles from the glue-down. I check carefully to make sure that I have good, level adhesion, and that the painting is glued properly in place, before I place the piece under heavy book weights.
I leave the piece under this book weight over night, but I check that the pressure is behaving correctly after about 2 hours, and then I re-stack all these books on the piece.
One might be tempted to forgo this book-weight step, but with heavier papers, it’s difficult to predict with 100% certainty when the pressures within the drying materials may cause the painting to unstick. So it’s much better being safe than sorry, and the consistent heavy weight also helps ensure that the drying glue is spread completely flatly beneath the painting, leveling out any hills and valleys caused by uneven glue application.
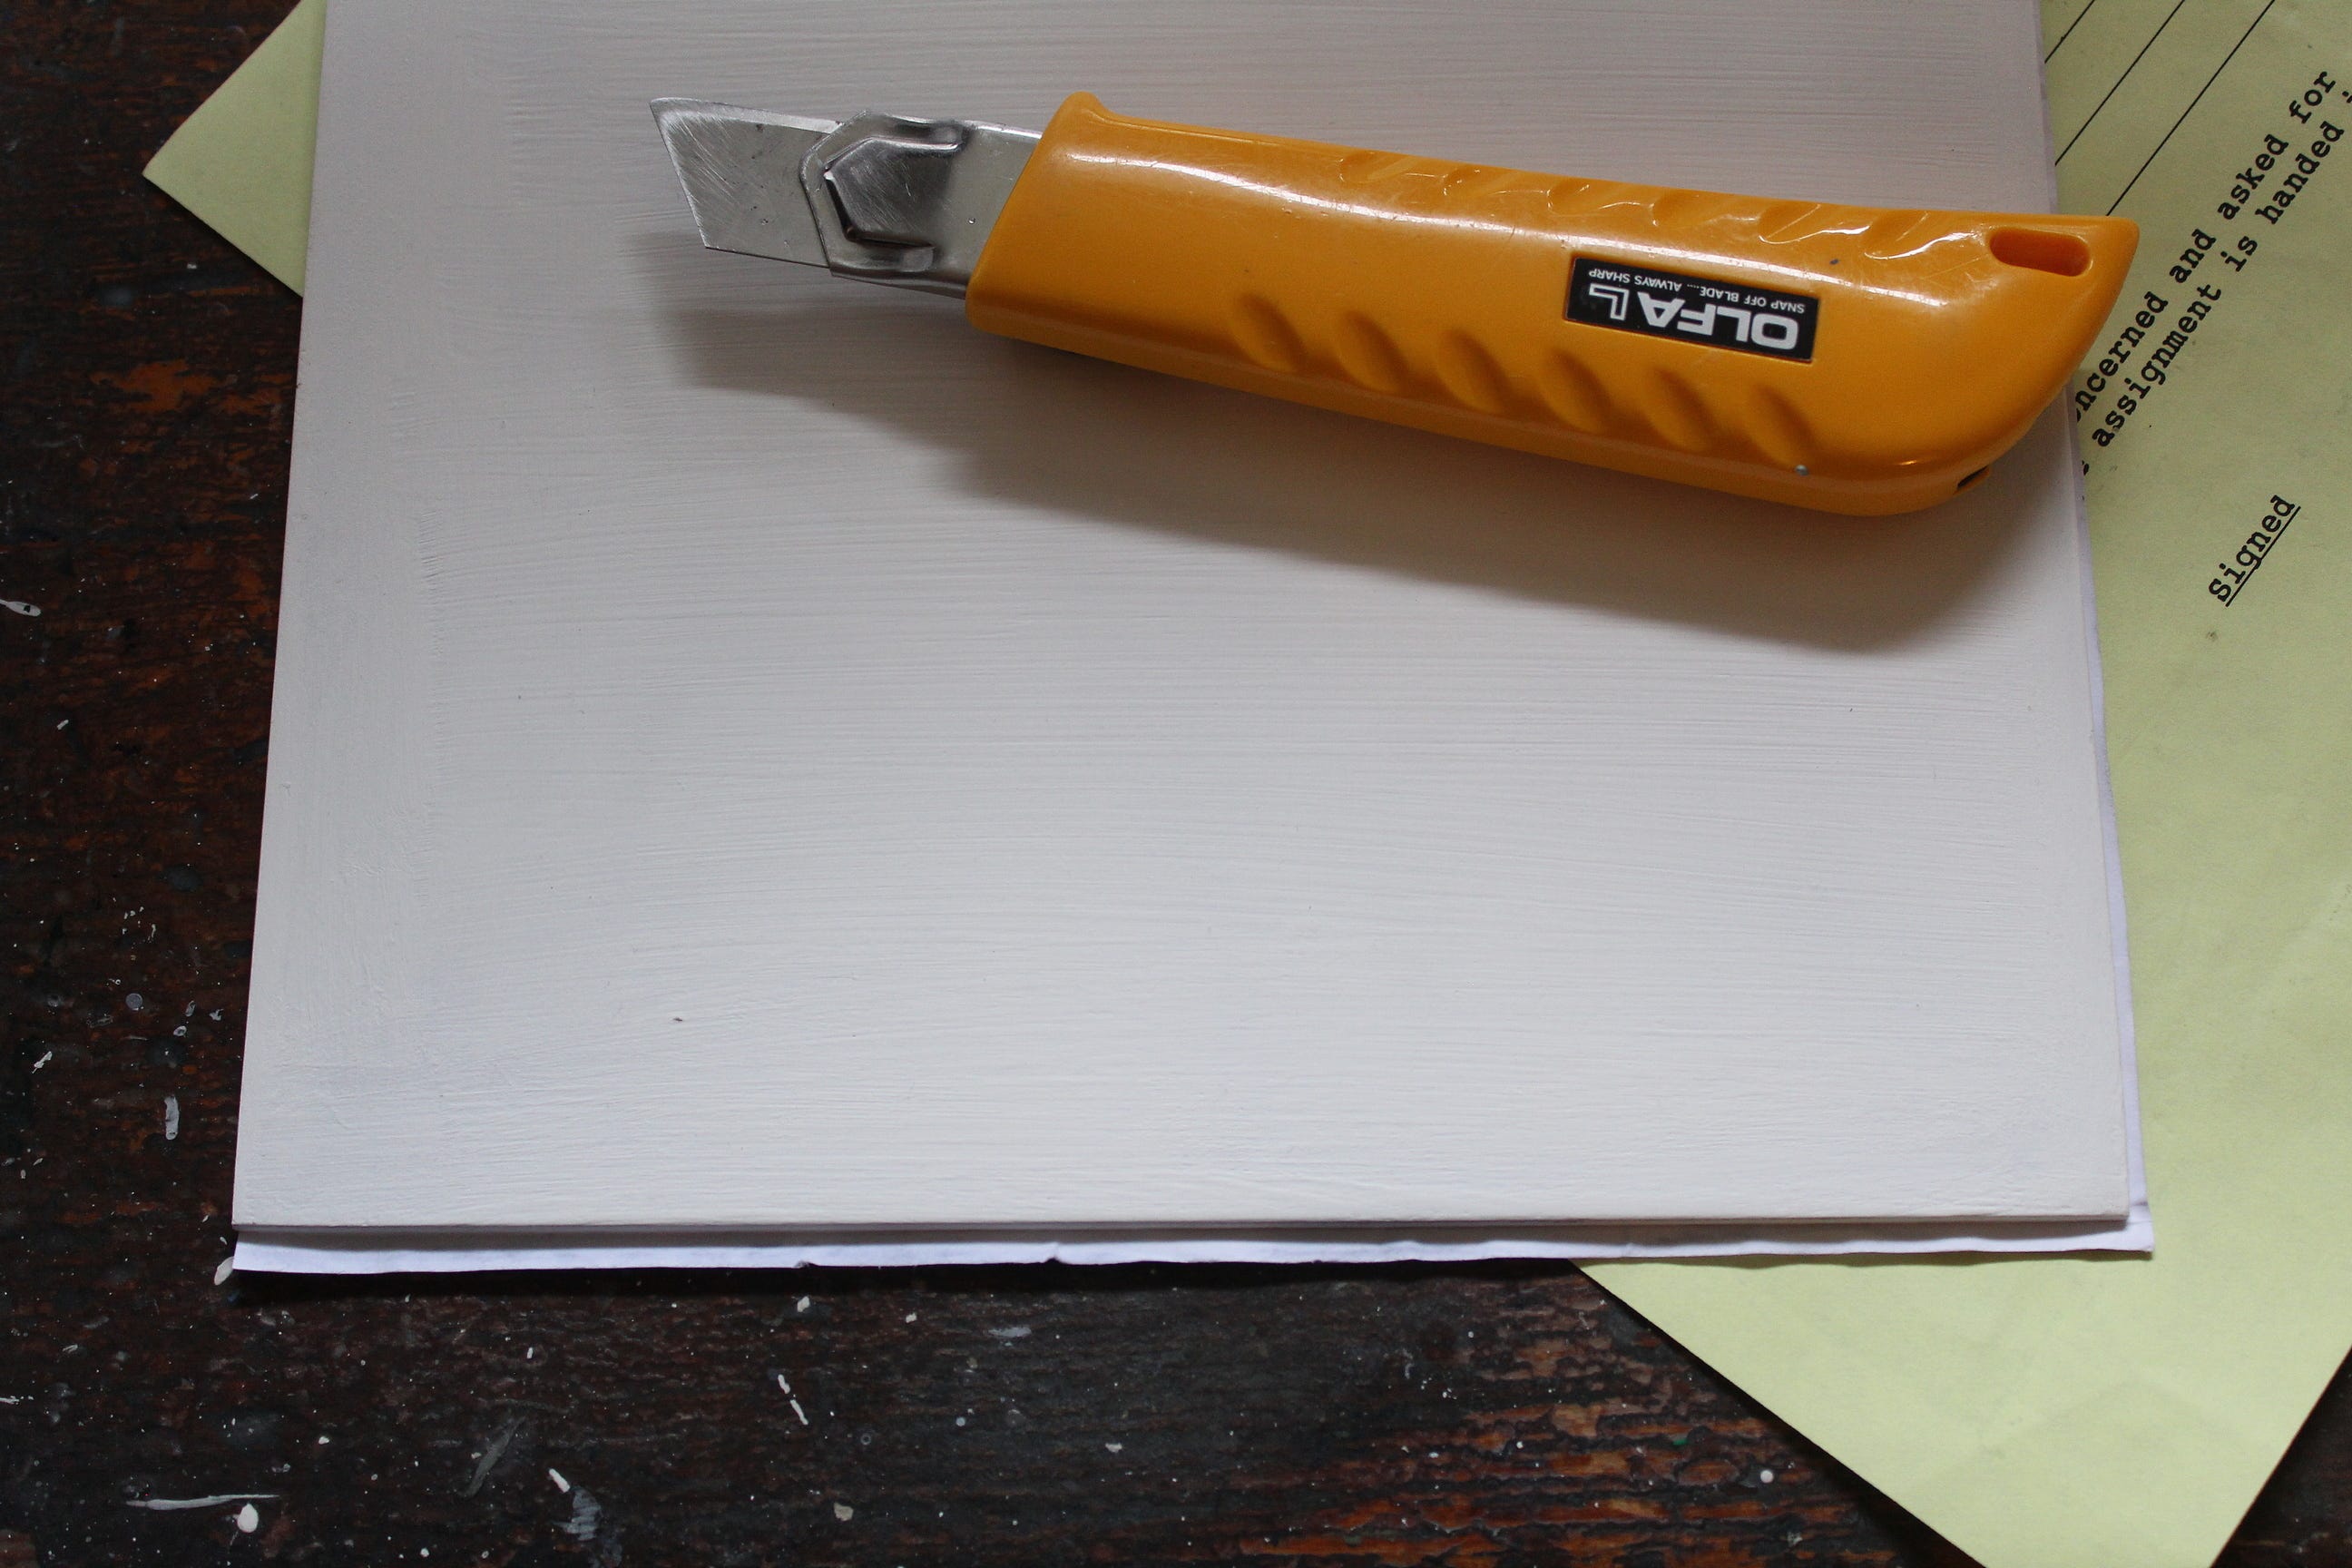
When the piece is completely dry, I use a very sharp utility knife with a new blade, with a yardstick as a guide, to trim right to the edge of the work with one firm cut. A hand-held blade can also be used if you feel you are getting enough pressure to cut through the paper in one cut. It’s important to have a firm but porous surface beneath you to receive the blade as it cuts through.
The photo above shows how I treat the overhang when I glue very THIN papers. With thin papers, I don’t trim the paper to the edges of the panel. Rather, I simply apply glue to the edge of the panel and on the excess bit of paper, and fold the paper over, applying very gentle pressure with the side of a pencil, or my thumbnail, to ensure a good gluing. This provides a very neat appearance, and there is no worry about making an incorrect or sloppy cut. But…this only looks good with very thin papers!
BTW, you may have noticed that the utility knife in the photo directly above is NOT sharp. Good eye if you noticed that! :) You can really screw up a trim job if you try to cut with a dull blade, and you really only get one chance to make that cut correctly.
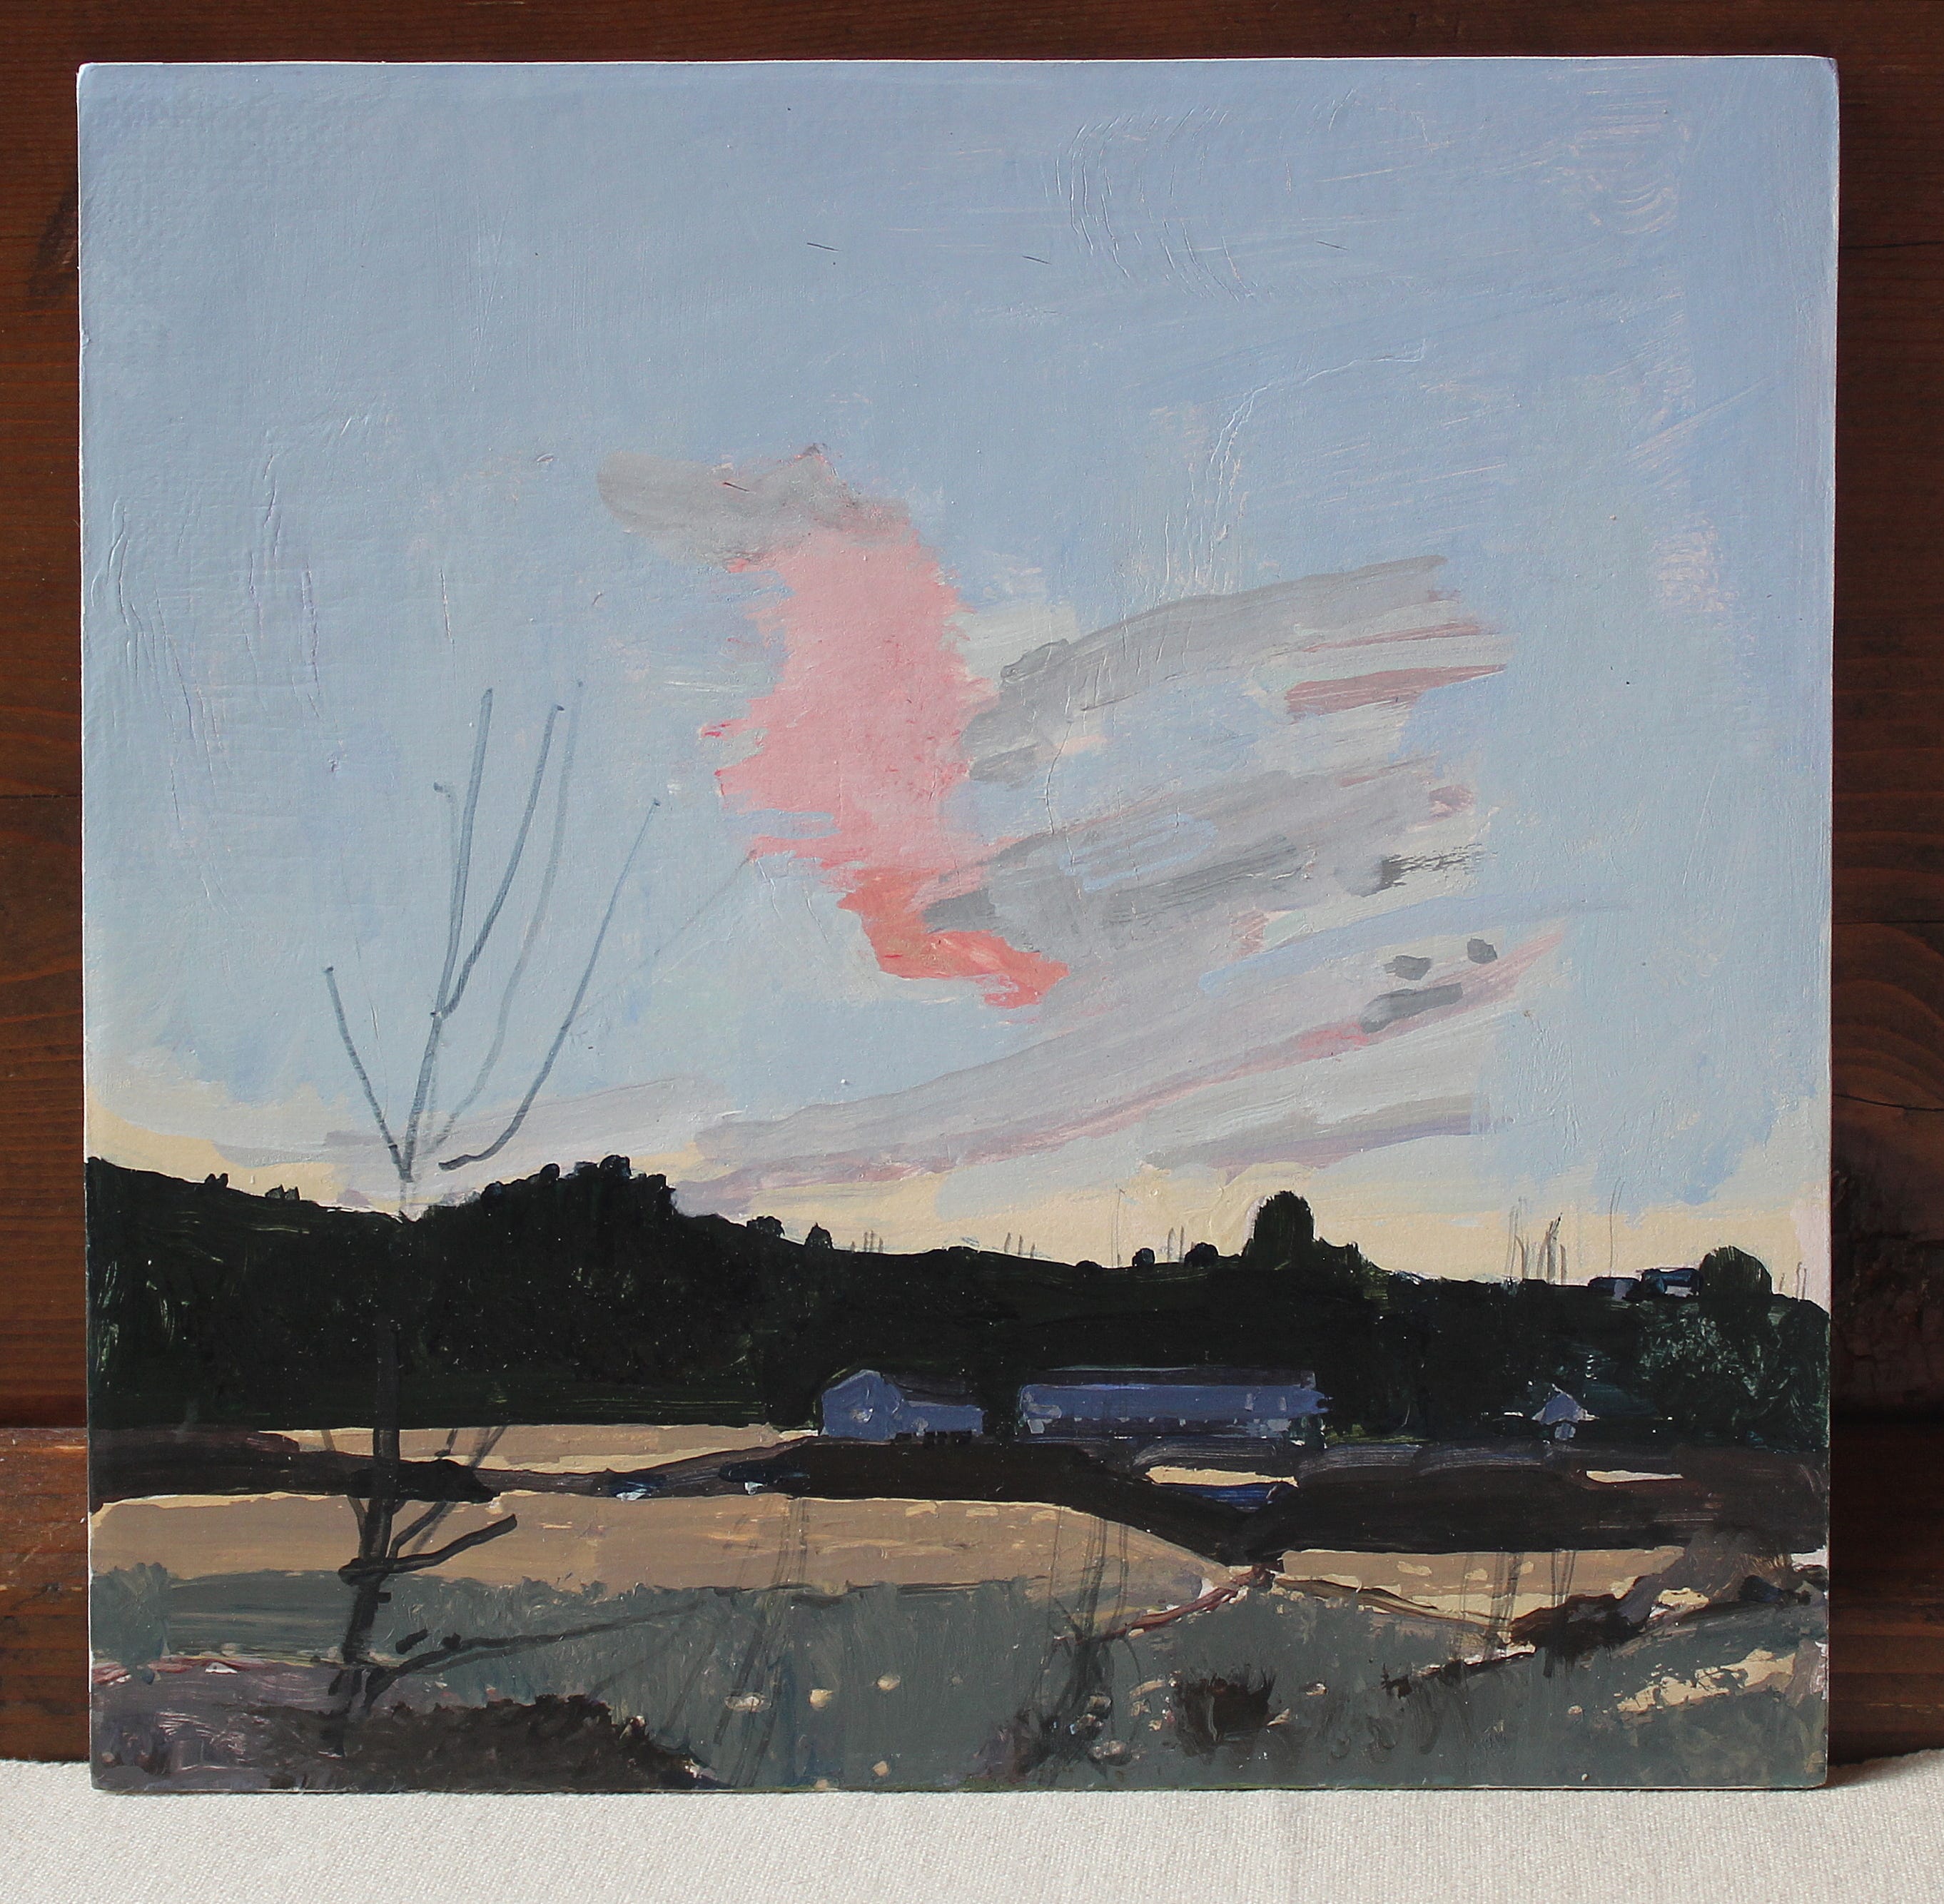
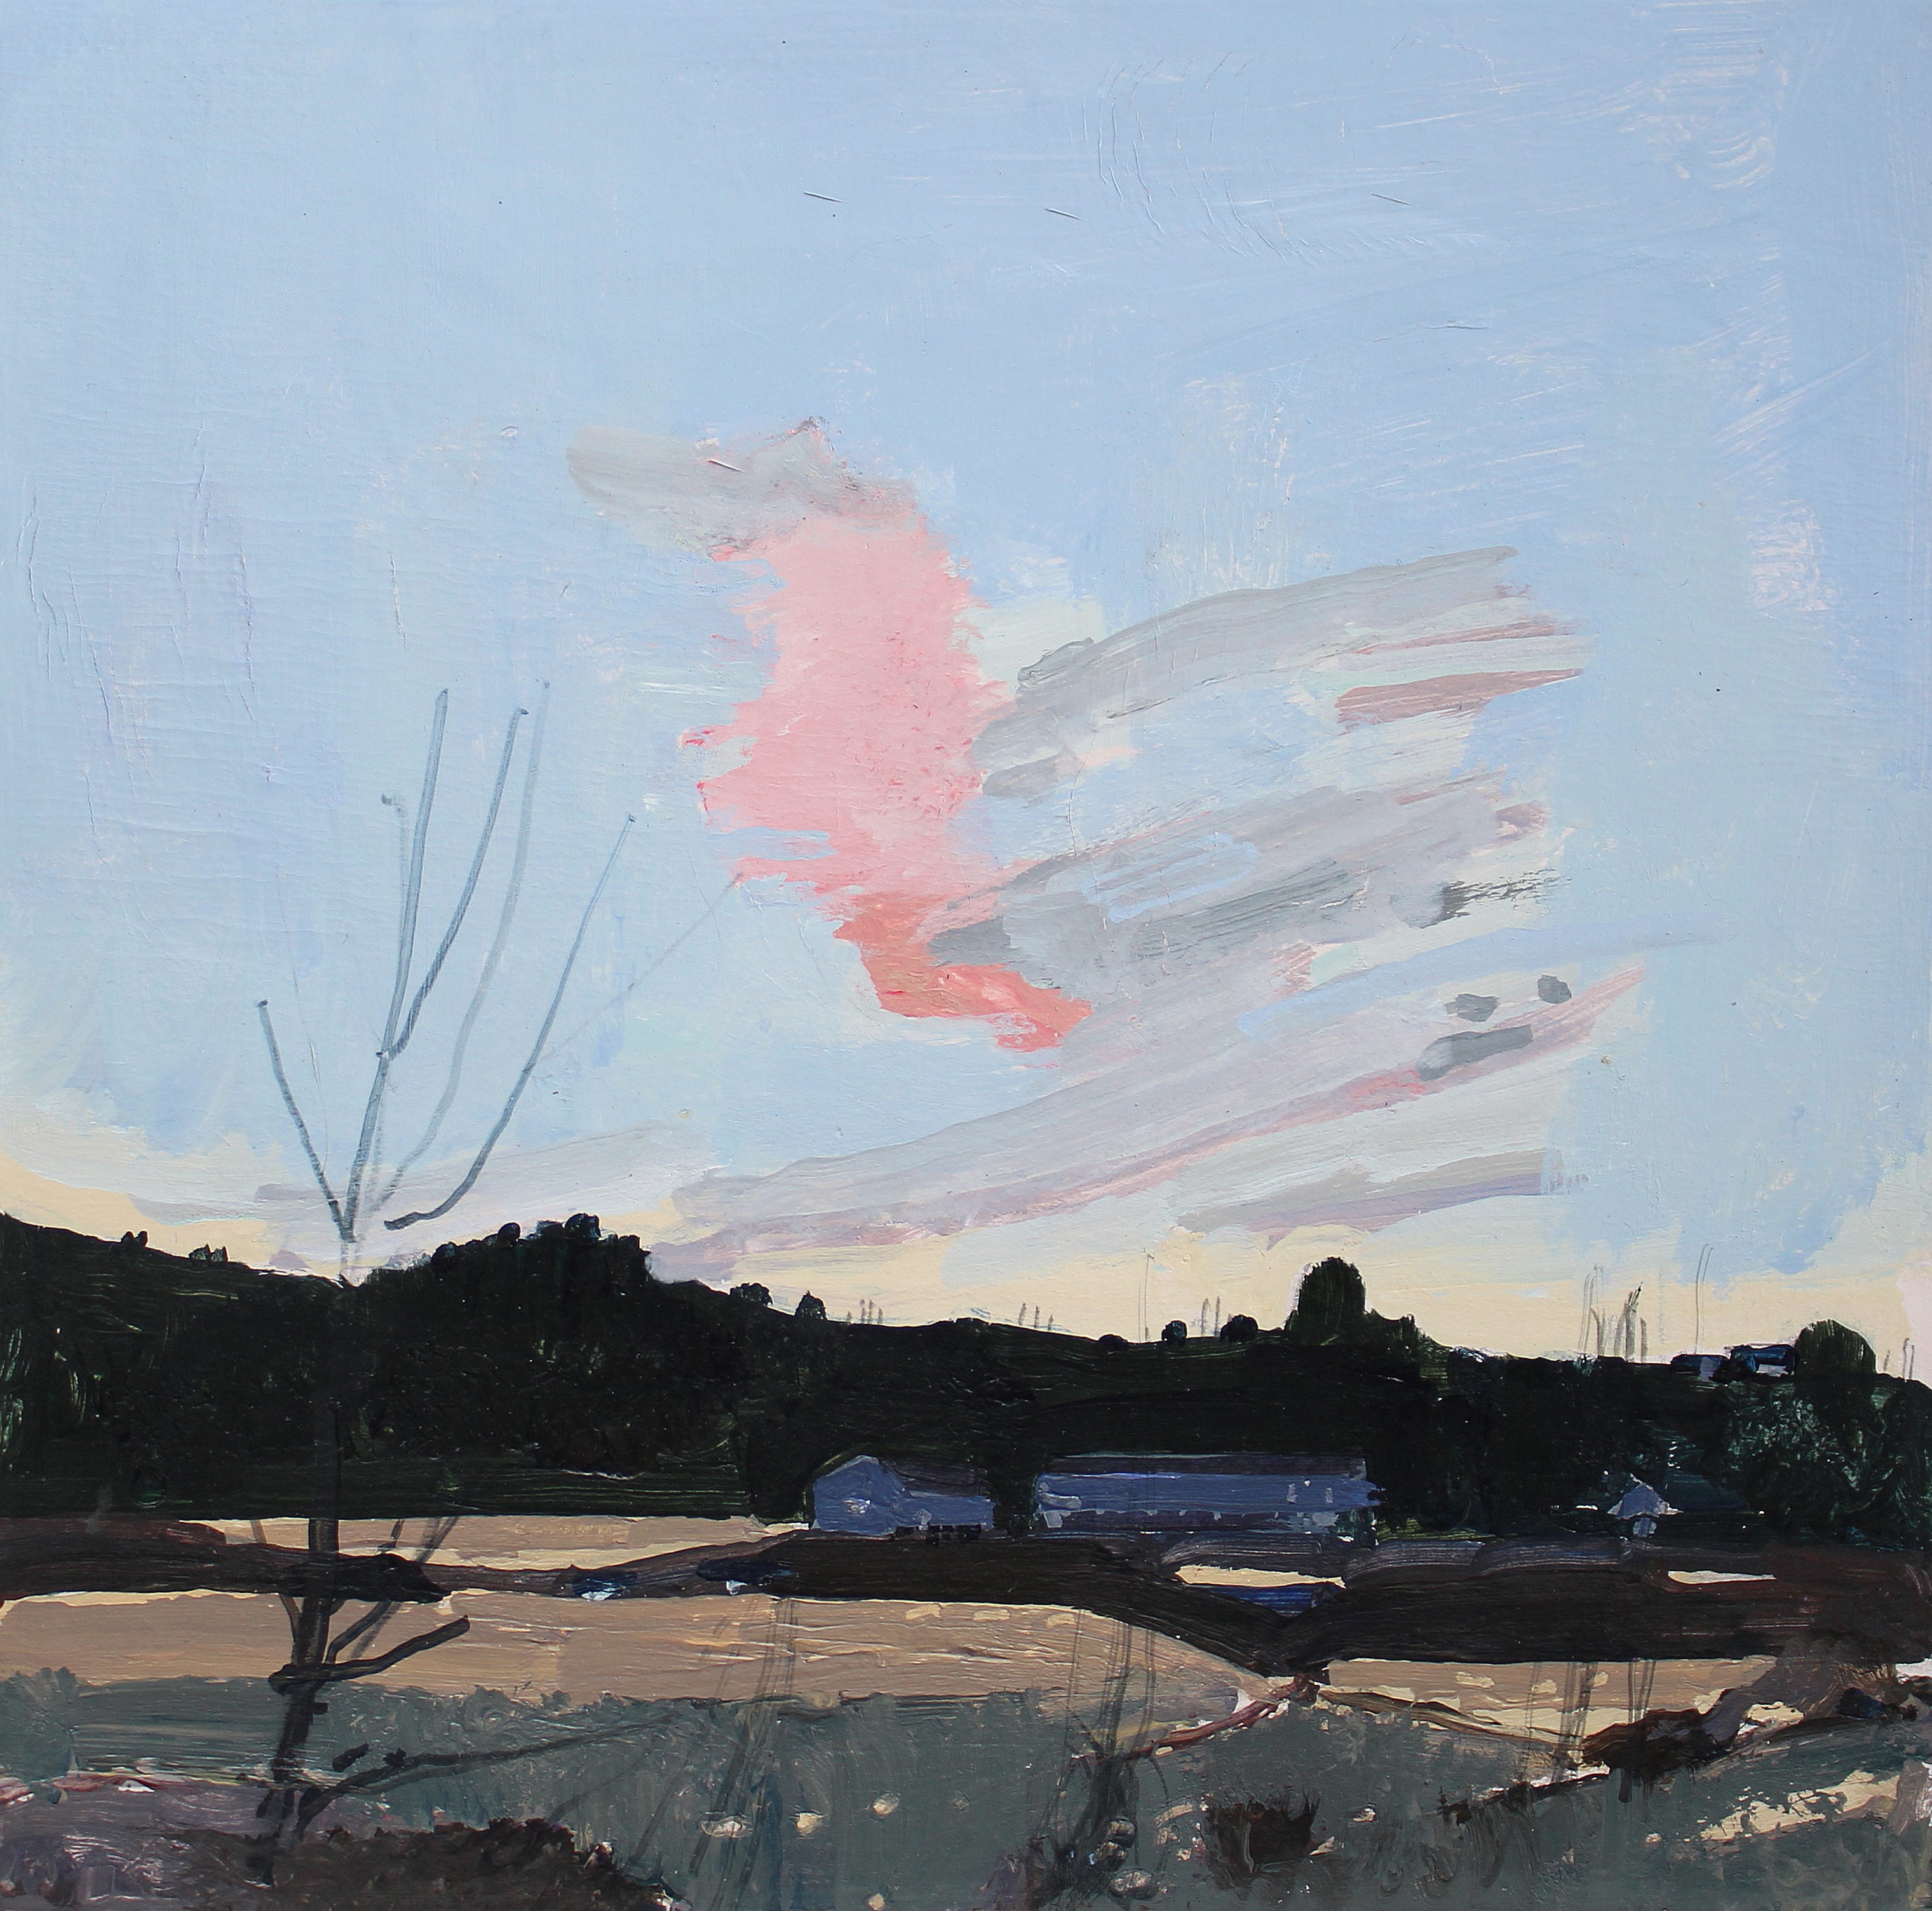
The completed work. Sometimes, when I’m gluing heavy papers or thin papers, some little thing can go wrong on an edge, requiring a very small paint touch-up. It’s very useful to remember how you mixed colors to create exactly matching touch-up colors, even if it’s only a tiny brush mark here and there. And if I can’t recall exactly how I mixed a color, I analyze the color, and match through my color mixing knowledge.
These small works on panel are lightly varnished with a satin acrylic Liquitex varnish to protect them. I also apply a final thin layer of cold wax medium, let it dry for half an hour or more, and then lightly buff it with a soft rag to a nice soft sheen. I like the surface this creates; it gives the painting an intimate encaustic quality, providing a warmer quality than normal acrylic.
Have a beautiful spring!
This work and so many others can be found here:
I ‘m enjoying reading your newsletter and Substack posts. Good stuff! I use a very similar process to make panels with Arches Oil Paper but I do it prior to creating the painting, usually 12” down to 8” squares. Curious why you risk damaging the painting by mounting it after it’s completed?❤️
Thanks for sharing. I’ve been experimenting with stretching paper too. My approaches have been a little different but I like this approach and will give it a go. Glad to have found your substack (via your IG)!